Posts

trail camera tips | Muddy Outdoors

Trail Camera Tips and Tactics For Deer Season

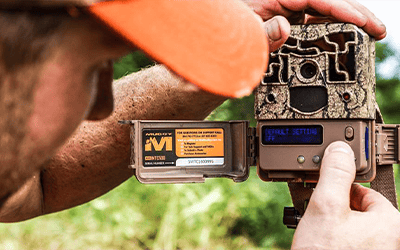
Trail Camera Setup Guide | Trail Camera Tips and Tactics

Trail cameras have quickly and undoubtedly become one of the most essential tools available to hunters, period. There is no question to whether or not a hunter should employ trail camera across his/her hunting property. The significance is common sense, but the knowledge of how to set up a trail camera properly is not as well known. Without the knowledge, a hunter cannot fully extract all of the  valuable information a trail camera can give, essentially wasting the money, technology, and more importantly time…These trail camera tips and tactics should set you straight.

How to Set Up a Trail Camera

Are you asking “how do I set up a trail camera?” read and watch below for a detailed how to.

Trail Camera Tips For Deer Season | The Buck Advisors
(Video) – As deer season becomes closer and is beginning in many states, you might have started employing trail cameras on your property. If that is the case then chances are you have asked how to set up a trail camera before. Here is a step by step guide on how to set up a trail camera and some other trail camera tips

When setting up a trail camera, you have to consider many factors including trail camera location, if the trail camera will be attached to a tree or stake, the distance to the target area, clear field of view, aiming the camera in the right direction, keeping the trail camera scent free, and ensuring you select the right settings when setting it up. These trail camera tips and set up steps can be hard to remember when you are in the field so take notice now, and even create your own checklist to run through each time you set up cameras.

Step 1: Trail Camera Purpose and Purchasing

Figuring out what information you want to capture with your trail cameras is the first step in this trail camera guide, and the first step when discussing how to set up a trail camera. Are you trying to retrieve intel on the following: a food plot, scouting for turkeys, scouting for deer, over a mineral site, trail camera survey, mock scrape, trail, bait site, deer feeder or another simply for capturing photos of other wildlife? Generally, any and/or all of these should be researched further in depth for specific tactics and trail camera tips, but more vitally what camera to look into that has the requirements and can capture that specific info.

For example trying to capture wildlife or deer utilization on a food plot might require a time-lapse or field scan feature, a trail might require a fast trigger speed, and a mineral site might require a video mode or multiple photo burst mode. Purchasing an overall great trail camera that has all of these features included, is a multifaceted bang-for-your-buck…literally. A trail camera with all of the following allows you to use it every part of the year in all different scenarios.

trail camera tips pro cam 12 | Muddy Outdoors

  • 12 Megapixel
  • 2 – 8 Photo Bursts
  • 1280 x 720 HD With Sound or VGA (32 FPS) with Sound Video
  • .6 Second Trigger Speed
  • Invisible Flash with 36 HE LEDs
  • Simple to Program
  • Backlit LCD Screen to easily navigate through settings any time of day
PRODUCT SPECS
SIZE: 4.75″ H x 4.25″ W x 2.5″ D; SCREEN: Backlit LCD Screen; FLASH RANGE: 70’+; LEDS: 36; IMAGE QUALITY: 12 Megapixel; TRIGGER DELAY: 10 Options: 2.5 Sec. – 60 Min; TIME-LAPSE PERIOD: 1, 2, 3, or 4 Hours After Sunrise & Before Dusk, All Day or Custom Start/End Time; TIME-LAPSE FREQUENCY: 10 Options: 5 Sec. – 60 Min; IMAGE DATA: Camera ID, Date, Time, Temp, & Moon Phase; VIDEO: 6 Options: 5 Sec. – 2 Min Length; MOUNTING OPTIONS: Adjustable Strap with Buckle; Alternate: 1/4″ – 20; THEFT DETERRENCE: Cable Lock and Padlock Ready; BATTERY TYPE: 6 AA or 12V DC Alternate Power Option; COLOR: Non-Reflective Bark Pattern; MATERIAL: Molded ABS; Waterproof Housing; MEMORY: Requires Secure Digital Card, Up to 32GB; PRODUCT WARRANTY: 1 Year; OPERATING TEMP: -10 Degrees F to 140 Degrees F; DETECTION RANGE: 70′; FIELD OF VIEW: 3 Zone + 50 Degree Detection Angle; BURST INTERVAL: 2 Seconds or 0.6 Seconds; BATTERY LIFE: Up to 10,000 Images

Again, this is the first step, selecting a camera, and outlining exactly what intel you want to gather. After knowing these basics you can dive into actually setting up a trail camera in the field. The next step after determining what you want to use the trail camera for is selecting the trail camera location in order to capture that exact data.

Step 2: Trail Camera Location

Defining what you want to achieve with your game camera will tell you where to put it, it’s really that simple. Trail camera location is step and trail camera tip number two in this trail camera guide, and after the initial cam requirements, is the next most important consideration.

Food Plot Location: Either on a tree or a stake at a key entrance/exit point into or out of the food plot or high above the food plot for a time-lapse view.

Trail Location: At a 45 degree angle from the trail. Perpendicular or straight on from the trail can either not capture the deer or wildlife walking, and directly behind or in front of can result in spooked game or a picture that may have features like antlers covered up.

Bait/Mineral/Water/Feed Location:  The best trail camera location for a mineral, bait, water, or feeding site is position roughly 10 yards, close enough to see detail but distant enough to see everything utilizing the site.

Step 3: Trail Camera Installment

Each trail camera location that you end up installing a trail camera on will come with its own characteristics and limitations. A perfect tree will not always be available, rather it seems most of the trees you encounter are entirely too small or too large in diameter. When hanging and installing trail cameras, remember that you are not always limited to a tree or a fence post, and if you are, there are other tools other than a strap that can connect it to a tree.

trail camera tips trail camera mount | Muddy Outdoorstrail camera tips trail camera stake | Muddy Outdoors

Muddy has trail camera accessories that make it very easy to put a trail camera literally anywhere that you need. These trail camera accessories include trail camera stakes and trail camera mounts for either ground mounting or mounting on any sized tree or post. Both the Adjustable Trail Camera Support and the Dual Camera Ground Mount are important considerations when you are installing your trail camera.

Step 4: Trail Camera Field of View (FOV)

What is in the field of view for the trail camera? This is nearly as important as the consideration of how far the camera can detect and take pictures. As far as trail camera tips go, this one is often forgotten or goes unnoticed. What is in the FOV can determine a lot about the quality of intel you get. A branch, bush, tree, feeder, or another object in the FOV and frame can either set off the camera multiple times in the wind or block the image entirely. Objects can also interrupt the trail camera being able to detect wildlife, as well as catch the flash during the night.

Step 5: Trail Camera Night Photo Distance

Flash range distance during night events for trail camera should be considered when purchasing and determining the best steps in how to set up a trail camera. Step 5 in this trail camera guide is here for good reason. Often times night flash range and the ability to accurately judge what is in the photos/video during night events is often forgotten and ends in frustration of missed opportunities. A lot of wildlife, including deer, move during night-time hours, this is common knowledge, so be sure to include it when you are setting up your trail cameras.

The trail camera settings for the flash will include the sensitivity settings, high sensitivity should be used for open expansive areas such as food plots, bait, mineral, mock scrapes, watering holes, and feeding sites. Low sensitivity should be used on areas in thick areas and on trails.

Step 6: Trail Camera Direction

The sun can have a profound effect on the information you receive from your trail cameras. This is not discussing night vs. day activity or the events, rather the blinding effect the sun can have on the images themselves. Facing the camera East and West will result in white images or images that are unclear due to the sun. South is acceptable, but when setting up trail cameras always try and aim the camera north.

Step 7: Trail Camera Scent

This is especially true for deer, or just for keeping your trail camera safe from critters! Most people, when it comes to setting out trail cameras don’t think of, or simply do not care enough to worry about scent control and trail cameras. This is a big mistake. Number 7 on this trail camera guide is trail camera scent and it can be critical. Trail cameras set out for deer is one obvious reason to take consideration of the scent you leave behind.

Human scent is a form of human pressure, and too much around a trail camera station could leave that site useless for a duration that is critical for collecting information. On another front, attractive scent can attract unwanted attention and/or damage to your camera. Putting out feed, a bait, or minerals for deer or other wildlife, and not paying attention to the scent and potential attraction that is on your hands before touching the trail camera can leave your camera smelling like food. Raccoons and bears both can be fairly hard on cameras when investigating them due to the scent and attraction of food or bait.  This also gives more of a reason for ants to invade your camera.

Step 8: Trail Camera Memory Cards

trail camera tips pro cam 10 bundle | Muddy OutdoorsTrail camera memory cards are a significant consideration when learning how to set up a trail camera. Not having enough memory, and keeping the cameras out for an extended period of time could render the camera useless over time. Another consideration is also formatting the memory card to the trail camera. With today’s trail camera like the Pro Cam 12 or Pro Cam 10 offering higher and higher resolution video and ever increasing high-quality photos, the need for more space is evident.

The size of the memory card you need largely depends on the trail camera settings you choose to set, and/or how often you check the camera. A trail camera set on video mode, with a 10-30 second delay over a bait site, will burn through memory quite fast, while a 3-photo-burst at 5 min intervals on the same site takes much longer to fill the same amount of memory. When deciding on how big a memory card you might need, consider what settings you will have the camera on, how long you plan on not checking and clearing the card, and the potential frequency of events the trail camera might encounter. Overall a good trail camera tip to remember is an 8GB memory card is a safe bet for most trail camera applications. In some situations like the Pro Cam 10 Bundle’s case, a memory card Is thrown in with the purchase of the camera.

Step 9: Trail Camera Batteries

While some of the very first models of trail camera ran off of huge D batteries, most trail cameras now run off of AAs. These have more options, are more readily found, and are quite easy to set up with rechargeable batteries. These might be the best options, especially when running several trail cameras.

Cold weather has quite an effect on technology so always be sure to check your trail cameras battery life during the fall and winter months. Both Muddy Trail Cameras, the Pro-Cam 12 and the Pro-Cam 10 have operating ranges between -10 and 140 degrees.

Step 10: Trail Camera Settings

With everything else optimized the most crucial step is putting the trail camera on the right settings, this is where most hunters mess up. Overall the trail camera settings are largely based upon what intel you wish to receive. However, certain scenarios and situations require specific settings in order to work. Trail camera tips for the settings aspect cannot simply be a broad overstatement, but instead require careful consideration and planning. Generally, use common sense…write down your goals, and think out which settings will give you that.

We recognize the lack of information on trail camera settings based upon each scenario you encounter in the woods. Look out on the GoMuddy blog page for ann article specifically about trail camera settings based upon each situation.

Step 11: Trail Camera Security

The last step and trail camera tip is simple…it’s trail camera security. Lock it up or lose it. Unfortunately, there are trespassers and given an opportunity to steal a camera, some will take it.  Running a cable lock through your trail camera can easily deter this from happening.

Other Trail Camera Tips

While going through the trail camera guide and steps on hot to set up a trail camera, we mentioned several different tactics such as setting up trail cameras for turkeys, trail camera surveys, minerals for deer, and scouting velvet whitetails in the summer. The links below will take you to those blogs!