Posts

Why have mineral sites for Bucks

Muddy Trail Cameras | The Why, When, Where, and How of Minerals for Deer

What You Need To Know for Putting Out Minerals for Deer This Summer

Tree stand maintenance, shed hunting, frost seeding, food plots, and then what? This has been the schedule from this point on for about 4-5 months. By the time food plots are planted, hunters can feel a false sense of accomplishment. They feel they can begin to calm down from the mad rush of spring chores and coast it out until deer season. Unfortunately for them there is still one vital piece missing from the checklist…putting out minerals for deer!

Now when it comes to mineral stations there is a misunderstanding that the common sense logic is correct, when in fact it really isn’t. Hunters each and every year will put out mineral stations for deer and miss the true reason for why we put out minerals. This article dives into the why, when, where, and how of mineral stations for deer.

Why and When Do We Put Out Mineral Stations For Deer?

The Science Behind the Need (Or Not) for Deer Minerals | Buck Advisors

(Video) There is a big misunderstanding that minerals equal big antlers, which is not correct! The Buck Advisors’ Weston Schrank reveals the real science and reason for mineral stations for deer!

The fact that putting out mineral bags and blocks for deer to grow bigger antlers is a false assumption. The real reason we put out mineral stations for deer is due to their salt craving for the summer. This craving is present during the entire time plant growth is at its peak in spring and summer with water and potassium content at an all-time high. This also happens to be when bucks are growing antlers, and does are giving birth to fawns and lactating over the summer. This is what creates the misunderstanding, the timing and need for salt in most hunters mind has suggested that deer need minerals, which in turn covers up the true advantage.

So if not for growing bigger antlers and helping fawn development why do we put out mineral stations for deer? The answer to this is our own desire. The desire for us to see velvet bucks can take advantage of the buck’s cravings for salt, revealing the real reason for mineral stations, taking inventory of velvet bucks with trail cameras.

Where and How Many Mineral Stations to Put Out

Deer Mineral Station Placement and Density | Buck Advisors

(Video)- Putting out minerals for deer is critical to start in May and June! Buck Advisor’s Weston Schrank explains exactly how many mineral stations for deer you need and where to place them on your deer hunting property.

One of the most important pieces of information, besides actually putting out mineral stations is, installing them at the correct density and in the right location. So where do you put mineral stations for deer out on your property, and how many do you put out? For this answer we have to touch on the real reason for these mineral sites again, basically to take inventory of velvet bucks.

That word, “inventory” is used only one other time when referring to deer…trail camera surveys. While putting out trail cameras over minerals for deer isn’t necessarily a trail camera survey due to the lack of specific settings, time of year, and applying an equation, it is keeping tabs on all the deer utilizing your property. In order to do this you have to be sure you are placing the minerals and game cameras in the correct locations and density (putting enough sites out to capture all deer on the property).

  • Where: throwing out minerals or a block just anywhere will not accomplish anything, you have to think and plan around it. You need to place the minerals and trail cameras in location that deer frequent. For spring and summer this means transition areas between food sources and bedding.
  • Density: Again referring to a trail camera survey most recommendations are a mineral station for every 80-100 acres of property, but only you can really tell how many mineral stations and trail camera sites you need. Habitat diversity, topography, cover, and human pressure can all affect deer movement and core areas, ultimately deciding how many mineral stations you should have. If a 50 acre property is separated into 2 different habitat types, and resulting in two different bachelor groups using different sides of the farm, then you need 2 mineral sites. Think back to hunting observations and past trail camera pictures to determine how deer use the property.

Patterning Velvet Bucks with Mineral Stations and Trail Cameras

The ultimate goal of installing mineral stations for deer, is to keep tabs and develop patterns on mature bucks. By putting out these sites in late May and early June, and keeping them running until deer season ( if your state requires minerals to be removed) will create a very detailed history and site map of a given bucks home range and core area. It also helps you create a detailed album of antler growth throughout the summer.

If your deer season is early enough such as Kentucky with an early September opener, you might even be able to kill you hit list buck based solely off of the trail camera data from the mineral station. If your hunting season starts later in the month of October, then you will miss the chance for velvet bucks and summer patterns. Fortunately placing a mineral station and trail camera in the right spot, such as a transition area, funnel, or run between bedding areas and food sources will also be a great spot for the rut cycles. This is where another critical point can be introduced, selecting the right trail camera for the job.

Patterning Buck with Muddy Trail Cameras

The new Muddy Outdoors trail camera lineup for 2016 should be a consideration for your trail camera over the mineral stations. The Pro-Cam 12 and Pro-Cam 10 are both quality cameras that can be reliable all summer long, all season long, and for multiple years.  The cameras have all the required specs and technologies to be a top contender for trail cameras that produce clear images for identifying individual bucks during summer. If you’re looking for new trail cameras this year to put over mineral stations for deer, check out muddy trail cameras.

While your food plots are planted, tree stands are up, and your summer checklist is complete, one vital to-do might be missing. If you have yet to put mineral sites and trail cameras up you are behind. Antlers are growing, bucks are feeding, they are craving salt, and we only have 4-5 months before deer season!

Spring Trail Camera Tips and Tactics | Muddy Outdoors

Get The Most From Your Trail Cameras This Spring

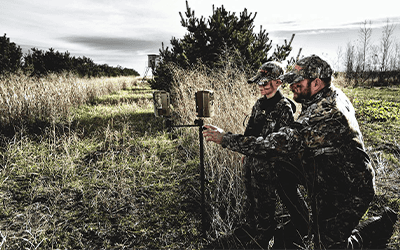
Trail Camera Tips | Trail Camera Selection, Settings, Placement, and Considerations for Spring

March is a hard and puzzling month, old man winter is confused, plants are confused, deer and turkey are confused, and you are completely lost. Plants, wildlife, and you, yourself do not even know whether or not to pull the trigger on spring activity or still lie dormant. Warm, sunny, 70 degree days one week, bitterly cold, snow storms the next is common, leaving you literally never knowing what March will throw at you. Most hunters, including yourself, are probably just breaking out of winter hibernation, and let’s face it, you were not productive were you? The most you might have achieved is getting your tree stands, ground blinds, or box blinds out of the elements over the winter, some shed hunting, but other than that you were unquestionably a dormant bear on that couch! You’re not the only one in the situation, besides other hunters both deer and turkey are in a tough transition this time of the year. During this time, it is important to act first, make the first strike on the season by getting your trail cameras out this spring and start the year’s observations. Follow these spring trail camera tactics to make the most of your cameras, your time, and ultimately your hard earned money.

Blowing the dust off, or opening the new box?

Game/trail cameras are without a doubt, one of the best management tools that a land manager can utilize. When it comes to documenting how your management implementations are progressing, a trail camera will provide information that is, in some cases, impossible to obtain otherwise. Before we dive into where, when, and how to set up your trail cameras this spring, you need to do an inventory check.

What cameras do you have? Are they still working? Are they the right camera for the situations that you will need to observe in the spring/summer?

Most likely your cameras are going downhill after a long season in the field, maybe they are still old school and lack the new features that are the standard in the industry. They might even be the reason behind the lack of bucks on your property, literally being too loud or too bright of a flash, or maybe you have mature bucks on the property, but the cameras just are not capturing all the movement! There is a lot at stake and a lot to consider. So the question is no longer if you should purchase a trail camera, but what type of camera should you purchase? There are numerous companies that make various models of cameras. Some cameras focus on trigger speeds, some feature time-lapse options, and other models feature HD video mode, or burst mode imaging. The model you choose depends primarily on what you want to know. Considering all cameras have improved their battery life and memory recently, let’s discuss their photo-capturing abilities to ensure you get the most from your unit.

Spring Trail Camera Tips and Tactics | Muddy OutdoorsFor example, if you are monitoring an area to document wildlife activity during food plot maturation, a camera with a time-lapse ability will be the best option. The time-lapse option will take photos at a pre-determined interval, therefore an animal does not need to be within a certain range to set the unit off. They will be captured on film regardless of how close or far away they are. This is ideal for open agricultural fields or food plots where wildlife congregates, especially if nailing down entrance routes into the field is tough to do. On the other hand, if you are capturing images to determine a buck: doe ratio, still images work best. Most trail camera surveys require baited sites, so any camera that takes still images will be preferred, even if it has a slower trigger speed. If a camera has a not-so-great trigger speed, it should be placed over a baited site where the animal will be stationary for some amount of time. Other cameras that have lightning-fast trigger speeds can be situated on trails, funnels, and travel corridors. By using your camera in this fashion, you are revealing useful management information but also capturing awesome photos.

Trail cameras that feature video, especially with audio, are great units that can be placed in various areas that not only provide insight on the wildlife that is using a particular area, but also make neat videos. A still image of a whitetail buck working a scrape is great, but a video where you can see and hear him in action is even better. The same goes for orienting a camera in a strut zone for turkeys. Once again, a video of a gobbling tom trumps a still photo. These camera sets are sometimes located at the base of a tree, looking up at the licking branch over a scrape. This setup provides a unique angle and adds a twist to an already great video clip. This can easily be done with the use of a tree mount in order to orient the camera in an upward angle at the base of a tree.

Today’s new camera units are jam-packed with technology and can tell you just about anything you would want to know about monitoring activity on your land. But before you jump the gun into a new camera, or think you can just settle with your old one, let’s examine the situations, and the exact requirements that you will need in a trail camera for this spring.

What is spring?

The answer is easy, spring is several things, beautiful, warm, sunny, life giving…but less harsh than winter, is unfortunately not one of them. While winter zaps battery life, it also does not require too much of a camera, there is really not a lot going on especially in heavy snowfall, and just plain old cold cannot completely kill a camera. Spring on the other hand is an explosion of life. In order to capture anything and everything that can and will be of use to you, a camera that can not only capture it is required, but one that can also survive.

Spring is wet, humid, and full of critters. Water damage (rain and humidity), critter damage (ants), and even other human’s stealing the cameras are all of concern before we even dive into specific situations of trail camera use and placement. So keep this harsh environment in mind when thinking about your current trail cameras, or new cameras on the market.

Spring food plot monitoring

While all this crazy weather is going on, it is literally the perfect time and opportune moment to start your food plots for the spring. You’re crazy to think we are suggesting to plant beans or corn during this time of year (this early), but a more effective, potentially more important food source for whitetails this time of year is early clover plots. Clover plots excel this time of year, being one of the first green sprouts that are rich in protein and nutrients a pregnant doe or a budding buck will gladly devour.

Spring Trail Camera Tips and Tactics | Muddy Outdoors

Having this extremely useful plot, especially in areas where you could not reach the acreage to plant beans or corn, will allow you to pull, hold, and observe mature bucks over the spring and summer. Whether its frost seeding a plot, installing a poor man plot, or disking or tilling up a small plot, putting in clover now can be rewarding all year long. In this instance, a camera on video mode, time-lapse mode, or simple image burst will work. Given the normally small acreage of the plots time-lapse isn’t necessarily needed, but will still be advantageous. Put the trail cameras up in early spring to observe fawns and bachelor groups in spring and summer, and be sure to keep them up. The small clover plot is an ideal area to hang a set for a staging area into larger food plots in the early season.

Deer feeders

Nutritional needs fire back up after the long winter, that much needed protein and nutrients available in clover and other food plots during the spring, can be easily supplemented or added to with a deer feeder. Consequently feeding stations make perfect opportunities to observe feeder use. In order to minimize stress on a feed site, and to keep deer and turkeys coming back, a camera should be small, quiet, and have an invisible flash. Either video, or image burst works well, but set the camera on a 5 minute or longer delay in order to avoid the thousands of pictures, but still identify each visit.

Spring Trail Camera Tips and Tactics | Muddy Outdoors

Feeders unfortunately attract unwanted attention from neighbors and trespassers, so be sure any trail camera placed over a feeder is either locked on the tree, or small and compact enough to hide well.

Strut zones

If food plots aren’t on you forte, you may want to reconsider. Pacing trail cameras on or over small clover plots will most likely reveal a strut zone, or area where toms and hens will gather during spring. Clover plots are coveted by turkeys and turkey hunters during the spring. The hens will feed there and bring in the toms, which will give you an ideal spot to set up the decoy and ground blind. Besides clover plots, open fields, Ag fields, pastures, or open wood lots make perfect strut zones.

Spring Trail Camera Tips and Tactics | Muddy Outdoors

Trail camera selection and more importantly trail camera settings will be slightly more dependent on the situation you are heading off to be your opening weekend spot. If you are in heavy timber image-bursts or video mode with minimal delay is ideal to place on funnels or routes turkeys will take going into or out of food sources, or where they might end up scratching throughout the day. For the fields and food plots place the trail camera settings on time-lapse. This will end up giving you exactly where and when the toms hang out in the field.

Mineral sites

When spring annuals and food plots sprout up, minerals and slat attractants are put down. Have you ever wondered why deer and salt are so attractive to deer during spring in particular? Sure they use the traces and nutrients, but salt is what they are after. High water content in the rapidly growing plants of March, April, and May equates to a lot of water metabolized by deer, causing a need and crave for sodium.

Spring Trail Camera Tips and Tactics | Muddy Outdoors

Luckily this need creates a very attractive site, and opportune moment for a photo session. Either a video or photo burst works well with mineral sites. One thing that goes for both mineral sites and feeders is distance of the camera….to close you don’t get the entire picture and you have the potential to disturb the deer, too far and you cannot see the detail you would like. Finding a camera with a great invisible flash range, plus high MP, quality images and HD videos should be a no brainer for purchase in these scenarios.

Trails and funnels

Placing trail cameras over trails and funnels really seem to be underestimated, and for good reason. Placing cameras over mineral sites, clover plots, fields, and strut zones are so much more effective. But placing trail cameras over trails, runs, and funnels can and often will be more effective at telling you information you will rely upon. If you have deer hunted long enough, even turkey hunted long enough, you know particular things about their movements. Mature bucks, or turkeys might be camera shy when it comes to a mineral site, or field edge. But hanging a camera, the right type of camera is essential, high looking over a trail will often catch mature buck or tom movement that will otherwise go unnoticed.

Both deer and turkeys will often take the excursion approach when it comes to their daily movements. Sure, they are on patterns when it comes to spring and even more so for summer, but that does not mean they won’t take the safest route. This is why the right type of camera is important. A small, quiet, inconspicuous, and invisible flash camera is perfect for trails. A mineral site, feeder, or clover plot might be anticipated for some sort of stress (camera flash, sound, physical sight of the camera itself), the deer get used to it and the costs (stress) do not outweigh the benefits (food and nutrients). A trail can easily be wrote off if stress is involved. Keep your trails and funnels stress free all year in order to preserve them active.

So which camera is right for you?

Your next step is to blow the dust off your old trail camera, is it even working? Is it worth it to buy the batteries needed the rest of the year, is it time to take it out back and (metaphorically) put it out of its misery?

Next, decide which scenarios you see yourself needing a camera for. Are you the avid turkey hunter, fanatical deer hunter, or the passionate land owner/manager? Are you all three, like every hunter seems to be? In that case strongly look into purchasing a camera with the following requirements.

  • Small/Compact size
  • Able to be cable locked and secured
  • High image quality ( Trail cameras in this century should be at or above 10MP)
  • Photo-Image burst capability (day and night)
  • Time-lapse capability
  • Video capability (Audio included)
  • Invisible flash (black)
  • Simple operation and backlit screen (to see in low light)
  • Trigger delay options
  • Image data: time, date, temp, camera ID
  • Waterproof housing
  • Product warranty
  • Battery type: AAs (are easiest and have great rechargeable option)
  • Detection and flash range > 10-15 yards (30’-45’ at least)
  • Wide Detection Angle
  • Several mounting options: tripod, screw in, and straps
Muddy ProCamTrail Cameras at the 2016 ATA Show
(video)- Published on Jan 16, 2016, Muddy ProCam Trail Cameras at the 2016 ATA Show, Muddy’s new line of cameras for 2016, including The Pro-Cam 10 and The Pro-Cam 12.

Spring Trail Camera Tips and Tactics | Muddy OutdoorsSpring has arrived, and with it an opportunity to gather some critical information with your trail cameras. Don’t miss this opportunity due to an old camera, or an inefficient new one. Make the right choice and follow these trail camera tips on settings, placement, and considerations for this spring.