Posts

Muddy’s Trail Camera Schedule | Setups, Tips, Settings, and More
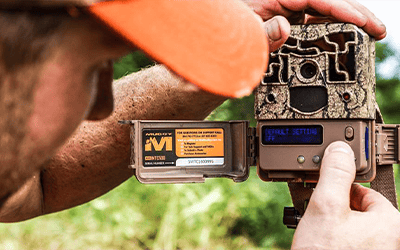
Trail Camera Tips | Muddy’s Trail Camera Schedule

If you’re like many hunters, your trail cameras are probably in full swing right about this time of the year. Early bow hunting seasons aren’t that far off, and bucks are starting to look pretty enticing when they pose for a portrait. But once the fall hunting season is finished, do you pack your cameras up and quit until next summer? Most people do, and they’re missing out on a lot of critical information about the deer they hunt. Here’s a comprehensive trail camera schedule you can use to keep tabs on the deer herd throughout the entire year.

But first, what can you learn from an annual trail camera schedule? Plenty. In the winter, you can keep tabs on deer to see which bucks made it through the hunting season and help you plan for next year, plus you might even find some shed antlers in the process. Spring means lots of new deer hitting the woods, so you can watch your clover fields as they fill up with pregnant or nursing does and bucks trying to recover from the winter. In the summer, you can watch bucks as they start to grow their antlers and develop a hit list for the current season. And then, of course, you know what fall means – lots of opportunities to learn where deer are bedding and feeding so you can put all of that trail camera work to good use and hopefully arrow a buck.

October Trail Camera Schedule

Conditions 

  • Cooler weather, great fall scenes, and lots of deer action all combine to create the most magical time of the year for deer hunters. But there’s a lot happening for deer and their habitats in October. For one, bachelor groups should all be split up as bucks shift ranges and get more competitive and aggressive with one another. The native vegetation should be drying up and most crops are starting to be harvested, which is reducing or changing their food sources to acorns, apples, and waste grain. Leaves fall in autumn, which drastically changes summer bedding areas and movement patterns. On top of it all, there are more hunters out in the woods to pressure deer. When all of these things combine, it’s what many people call the October lull. The best time to hunt the October lull is absolutely during and right after a cold front, which gets the bucks on their feet and moving around again.

Where to Hang Trail Cameras 

  • In this magical deer hunting month, the best trail camera setup location is on deer scrapes – either natural or mock scrapes. Bucks and does both start using scrapes heavily in October to communicate breeding statuses, which make them great focal points for trail cameras. If you can find a scrape (or make a mock scrape) downwind of a doe bedding area or within a funnel to a food source, you can be pretty confident you will catch bucks using it. 

Trail Camera Settings 

  • This is when trail camera tactics really matter for hunting purposes. Since your trail cameras will likely be located on scrapes, using photo bursts or videos are a good way to get great shots of the bucks in your area. Videos of bucks rubbing licking branches or making a scrape are exciting to watch! Also, make sure you know how to hide a trail camera – keep them well camouflaged with brush and off to the side of approaching trails so you don’t spook approaching deer. Check your trail cameras often enough to know what deer are there, but not enough to pressure them.

November Trail Camera Schedule

Conditions 

  • In most of the Midwest and even parts of the south, November means one thing for deer hunting: the rut. During this time, bucks tend to make mistakes, which means you can have a good chance to shoot one. Many a buck has been led to his doom by following a hot doe. The weather also typically takes a nose dive this time of the year, producing very cold temperatures and maybe even snow. Deer will really key in on high energy (carbohydrate) foods, including any remaining nuts, apples, corn, beans, turnips, and cereal grains.

Where to Hang Trail Cameras 

  • Like October, deer scrapes can still produce some great trail camera pictures since bucks are actively seeking does. Food plots can occasionally still catch bucks during the day if your property is very unpressured and secluded since does will still feed and they attract bucks. But if you’re using trail cameras on public land or you have a smaller pressured property, scrapes are the way to go. Funnels between bedding areas and food sources are also good, especially if you take habitat and topography into consideration.

Trail Camera Settings 

  • For November, you really need to know how to set up a trail camera. Bucks are usually hot on the hooves of any estrous doe they find, so the usual trail camera settings may not work well. The pace is fast, and you may miss the action if you don’t take the time to do the right settings. With a 6 photo burst or a 2 minute video, you can be sure that any doe that passes through will trigger the camera, but you will also catch the buck following her. 
  • Additionally, just like October, you should position the camera higher (about 6 feet off the ground) so it is slightly out of a deer’s immediate view. Use a stick behind the top of the camera to position it downward. Also, keep it angled about 45 degrees to trails approaching scrapes so you don’t spook the deer you want pictures of. 
  • As far as how long to leave a trail camera out in November, check them sparingly so you don’t spook deer, but often enough to know where you should be hunting. A good way to do this is to set up cameras near your access trails so you can easily check them while you enter or leave a tree stand location.


December Trail Camera Schedule

Conditions 

  • This the beginning of the hardest time in a Midwest whitetail’s life: winter. Cold weather, biting winds, snow, and a decrease in high quality food all work against them. In southern areas, there may yet be good food sources available for deer, but there’s definitely a change. In addition, most bow hunting seasons are still open and some late season muzzleloader hunts may also open, which can pressure them. While bucks are weary and worn down from the rut, they will still feed with does and may breed any that come into estrous late, but food becomes the priority for them in December. You may also want to harvest does for meat at this point in the season since it will be your last chance until next year. 

Where to Hang Trail Cameras 

  • Since deer are transitioning to late season food sources (such as standing corn/beans, green cover crops, or turnips), the edges of these fields and trails leading to them are the best spots to hang trail cameras in December.

Trail Camera Settings 

  • For the last calendar month of the year in open field settings, you should switch your trail camera settings back to the time lapse function. You can choose the interval of how often the camera takes pictures and also what time of day it takes them (e.g., 2 hours before dusk, etc.). Hang it higher in a tree so that you can see the whole field, which may mean hanging it 10 feet up in some cases. In the dusk example, remember to aim it northeast so it’s looking directly away from the setting sun. This allows you to see exactly how deer are using the field and moving across it.

January Trail Camera Schedule

Conditions 

  • January is a tough time for whitetails. Bucks have been running all over their region chasing does down and fighting other bucks, not to mention dodging natural predators and us. During all that activity, they seldom stop to eat much either, which means they lose a substantial amount of body weight right during the coldest time of the year, when they need it most.

Where to Hang Trail Cameras  

  • In the mid-winter months, food plots and fields with standing agricultural crops (corn, soybeans, etc.) are some of the best places to hang trail cameras. Deer are looking for calories to help fuel them throughout the winter, and these crops will do that. Hanging a trail camera on a trail entering these areas also allows you to see what’s dropping for early shed hunting purposes.

Trail Camera Settings  

  • In winter, you will face two battles with your trail cams. One is the cold – it doesn’t take long for temperatures below zero to drain your battery life. The other is the snow – make sure your cameras are mounted to the tree or post above the snowline (4 to 5 feet is better than the usual 2 to 3 feet). Also, all the snow glare can make your photos turn out badly, so face them north to avoid the low southern sun. 
  • Because of the uphill battle against the cold and snow, you may want to check your cameras pretty regularly (every few weeks) if you want them to consistently take pictures. Otherwise, you may find that you arrive and your camera is buried in snow and has dead batteries. 

February Trail Camera Schedule

Conditions 

  • As with January, February is a hard month. In most areas, even standing crops can be picked over by now, forcing deer to rely on natural woody browse as their sole food source. Deer are also battling some of the coldest temperatures of the year, which means they seek thermal cover (e.g., thick spruce plantations, tall grasses, gullies out of the wind, etc.) whenever they’re not feeding.

Where to Hang Trail Cameras 

  • If there are still crop food sources available, these are still the best places for trail cameras. If you find that the deer have switched to feeding on browse in a certain area, try putting a trail camera on the trails leading from bedding areas to the browse. The trails are very easy to follow in the snow!

Trail Camera Settings 

  • Again, you will be facing the cold and snow in February, so hang your cameras higher than usual and check them regularly. Also, keep the trail camera placement facing north. 

 March Trail Camera Schedule

Conditions 

  • While southern hunters are out enjoying the woods in March, it is more or less the same as the other winter months in much of the Midwest, but it does offer a glimmer of hope. Temperatures start to climb and the snow pack may be melting slowly away. This can be one of the worst times for whitetails because they have browsed most high preference browse by now, but it’s too early for new growth yet. The melting of the snow may also reveal shed antlers for you to find.

Where to Hang Trail Cameras 

  • It seems most typical feeding areas are not attractive anymore and bedding areas are not easily accessible without spooking deer regularly. While that doesn’t matter for hunting purposes, you don’t want to stress the deer herd when they’re at their most vulnerable. Plus, if any bucks are still carrying antlers you would like to find, bumping them off of your property won’t help with that effort. Deer trails, especially where they cross a farm lane or hunting property road are fantastic. You can easily sneak in to check your cameras regularly without disturbing them, and keep tabs on when the deer are shedding their antlers.

Trail Camera Settings 

  • Since you’ll be using your camera on a deer trail, you need a relatively fast burst of pictures to capture the action as they move through. Alternatively, you could use the video mode too.

April Trail Camera Schedule

Conditions 

  • April is the turning point for the Midwest, as spring starts to slowly appear. The deep and shaded parts of the forests still contain very deep snow, but open areas melt fairly quickly. Deer may feed on newly exposed vegetation, but also still browse on whatever they can find.

Where to Hang Trail Cameras 

  • Deer trails and small openings are some of the best places for trail cameras this time of year. If you’re located further south, then perennial clover food plots and alfalfa fields will likely be greening up by then, and the deer will definitely be spending time in them. Plus, you have the bonus of scouting turkeys for spring turkey hunting with your trail cameras at the same time.

Trail Camera Settings 

  • In open fields, you shouldn’t have to worry about the snow anymore and there’s no growing vegetation that will interfere with the pictures, so you can resume your trail camera mounting height at about 3 feet off the ground to get a good deer eye level shot.

May Trail Camera Schedule

Conditions 

  • May is a very welcomed rest for whitetails because all kinds of natural vegetation starts growing like crazy again, including lush forbs, grasses, and tender new buds and twigs. Providing perennial clover fields on some part of your property is a great way to start feeding deer as soon as the weather warms up. Does are likely to give birth to fawns this month or the next, and bucks start to lump together in bachelor groups for the summer.

Where to Hang Trail Cameras  

  • In the early spring, it’s tough to beat lush green fields and food plots for watching does and fawns on trail cameras. Unless bucks have a distinct marking on them, it will probably be too early to start identifying any prior year bucks until their antlers grow back. Another good spot to hang your cameras in spring is a mineral site. Bucks, does, and fawns will all stop by mineral sites from spring through fall.  
  • One benefit of using trail cameras in the spring, especially along field edges or on mineral sites tucked into the cover, is that you can scout for turkey hunting still, and catch all kinds of other animals on camera, including black bears, foxes, bobcats, grouse, and many others.

Trail Camera Settings  

  • This time of year, you don’t have to necessarily worry about how to program a trail camera. You can really use whatever trail camera setting you want. If you’d like to get some videos of young fawns playing around in the fields, this is a great time to do it. If you’d rather just take pictures, you can set the delays and intervals to whatever you wish. In all likelihood, intel you get this time of year won’t tell you a whole lot about how to hunt next season. But if you’re a trail camera addict like us, you will just enjoy getting all kinds of great pictures.

June Trail Camera Schedule

Conditions 

  • When June hits the calendar, it’s time to start thinking about summer trail camera strategies. Deer will start hitting food sources and bedding areas pretty consistently throughout the summer. Bucks continue to build up their bodies and antlers by eating high protein foods and does need calories to keep up their milk supplies to feed their fawns. In highly productive areas, it’s not uncommon for a doe to support twins, so he needs to keep up the food consumption.

Where to Hang Trail Cameras 

  • It’s true that deer will reliably hit food sources hard in the summer, but food sources can be very scattered this time of year with all the abundant lush food available. Since there’s a lot of cover and no pressure from us in the summer, deer will often bed short distances from ag fields and food plots, which may be a great spot to hang cameras.  
  • However, better spots that will reliably attract deer include mineral sites and feeder stations. Where legal, these two areas will consistently pull deer in for great trail cam pictures. Corn is probably the best attractant for game cameras in these scenarios. Mounting trail cameras to a post or nearby tree is all you need to do.

Trail Camera Settings 

  • Again, you can choose your own preferences this time of year, but start focusing your trail cameras on taking bursts of photos when triggered, so you can be sure you get a few different pictures of a deer when it shows up to a mineral site, feeder, or food plot. Bucks will start to show some antler growth, and velvet pictures are amazing to look at. Try to stay away from your cameras during the summer, checking them only when you need to refresh your mineral site or feeder. While spooking deer this time of year won’t affect hunting, why pressure deer now if you don’t have to?

July Trail Camera Schedule

Conditions 

  • July is a similar story to June – deer continue to feed heavily to build up their fat reserves. Bucks keep building antlers and does keep fueling little fawns. The high heat and humidity may encourage deer to seek out water sources more frequently, which is definitely one of the best summer trail camera tips.

Where to Hang Trail Cameras 

  • Also like June, food plots, feeder stations, and mineral licks are the best spots to catch most deer (including bachelor groups of bucks) on camera. If you can pair a water hole or natural water feature with a mineral site, deer will stick around even longer for better pictures.

Trail Camera Settings 

  • As far as trail camera height, hang your trail cameras higher (4 to 5 feet) in the summer to avoid vegetation from blocking views, or occasionally visit your cameras to trim the vegetation down. Try to keep your cameras in the shade and pointed north so you don’t have a ton of pictures with glare.

August Trail Camera Schedule

Conditions 

  • During the month of August, a lot of native forbs and grasses start to dry out, causing deer to abandon them a little. Fortunately, soft mast trees (e.g., apples, crabapples, plums, cherries, etc.) and hard mast trees (primarily oaks) start ripening and dropping fruit this time of year. Deer will eagerly ignore most native forbs to feed on these highly nutritious and digestible fruits and nuts. Bachelor groups of bucks will usually be pretty visible in open fields as dusk approaches.

Where to Hang Trail Cameras 

  • If you have a grove of hard or soft mast trees that start dropping fruit, this could be a great place to hang a trail camera. Alternatively, you could place cameras on an established deer trail within a pinch point or funnel between the mast trees and their primary bedding area.  
  • If you don’t have any mast trees on your property, mineral sites and feeder stations will still attract deer. And placing trail cameras on field edges of large soybean fields this time of year will definitely still produce some good pictures.

Trail Camera Settings 

  • Follow much of the same advice for July (i.e., hanging cameras higher, pointing north, clearing vegetation, etc.).

September Trail Camera Schedule

Conditions 

  • Once September hits, most bow seasons open up and it probably feels like Christmas day to you. But for the deer, it’s the start of several months of harassment and pressure from us, not to mention changing conditions. September may have heat waves here and there, but you’ll notice temperatures start to cool down a bit. Bachelor groups start to break up a bit as they start shedding their velvet.

Where to Hang Trail Cameras 

  • For one of the last times of the year, food plots and ag fields are still a good spot to get daylight pictures of bucks. As the hunting season opens, most bucks tend to go nocturnal on many properties. Additionally, trails in between mast trees and bedding can still work well too. Just make sure the camera is pointed slightly towards the bedding area to get good afternoon/evening pictures.

Trail Camera Settings 

  • Keep your trail cameras taking bursts of photos so you don’t miss a buck moving through quickly. Alternatively, use the Muddy Pro-Cam 20 bundle (one of the best trail cameras on the market) to take time-lapse pictures before dusk to get an idea of which deer are using the food plot regularly. If you’re bow hunting, check your cameras enough to inform your hunting locations without putting too much pressure on the deer before October.

Time to Use This Trail Camera Schedule

There’s a lot of information in this article and we hope it hasn’t intimidated you. This trail camera schedule is meant to give you some new ideas on how and when to use trail cameras throughout the year so you can have the best hunting opportunities. Good luck this season!


trail camera tips | Muddy Outdoors

Trail Camera Tips and Tactics For Deer Season

Trail Camera Setup Guide | Trail Camera Tips and Tactics

Trail cameras have quickly and undoubtedly become one of the most essential tools available to hunters, period. There is no question to whether or not a hunter should employ trail camera across his/her hunting property. The significance is common sense, but the knowledge of how to set up a trail camera properly is not as well known. Without the knowledge, a hunter cannot fully extract all of the  valuable information a trail camera can give, essentially wasting the money, technology, and more importantly time…These trail camera tips and tactics should set you straight.

How to Set Up a Trail Camera

Are you asking “how do I set up a trail camera?” read and watch below for a detailed how to.

Trail Camera Tips For Deer Season | The Buck Advisors
(Video) – As deer season becomes closer and is beginning in many states, you might have started employing trail cameras on your property. If that is the case then chances are you have asked how to set up a trail camera before. Here is a step by step guide on how to set up a trail camera and some other trail camera tips

When setting up a trail camera, you have to consider many factors including trail camera location, if the trail camera will be attached to a tree or stake, the distance to the target area, clear field of view, aiming the camera in the right direction, keeping the trail camera scent free, and ensuring you select the right settings when setting it up. These trail camera tips and set up steps can be hard to remember when you are in the field so take notice now, and even create your own checklist to run through each time you set up cameras.

Step 1: Trail Camera Purpose and Purchasing

Figuring out what information you want to capture with your trail cameras is the first step in this trail camera guide, and the first step when discussing how to set up a trail camera. Are you trying to retrieve intel on the following: a food plot, scouting for turkeys, scouting for deer, over a mineral site, trail camera survey, mock scrape, trail, bait site, deer feeder or another simply for capturing photos of other wildlife? Generally, any and/or all of these should be researched further in depth for specific tactics and trail camera tips, but more vitally what camera to look into that has the requirements and can capture that specific info.

For example trying to capture wildlife or deer utilization on a food plot might require a time-lapse or field scan feature, a trail might require a fast trigger speed, and a mineral site might require a video mode or multiple photo burst mode. Purchasing an overall great trail camera that has all of these features included, is a multifaceted bang-for-your-buck…literally. A trail camera with all of the following allows you to use it every part of the year in all different scenarios.

trail camera tips pro cam 12 | Muddy Outdoors

  • 12 Megapixel
  • 2 – 8 Photo Bursts
  • 1280 x 720 HD With Sound or VGA (32 FPS) with Sound Video
  • .6 Second Trigger Speed
  • Invisible Flash with 36 HE LEDs
  • Simple to Program
  • Backlit LCD Screen to easily navigate through settings any time of day
PRODUCT SPECS
SIZE: 4.75″ H x 4.25″ W x 2.5″ D; SCREEN: Backlit LCD Screen; FLASH RANGE: 70’+; LEDS: 36; IMAGE QUALITY: 12 Megapixel; TRIGGER DELAY: 10 Options: 2.5 Sec. – 60 Min; TIME-LAPSE PERIOD: 1, 2, 3, or 4 Hours After Sunrise & Before Dusk, All Day or Custom Start/End Time; TIME-LAPSE FREQUENCY: 10 Options: 5 Sec. – 60 Min; IMAGE DATA: Camera ID, Date, Time, Temp, & Moon Phase; VIDEO: 6 Options: 5 Sec. – 2 Min Length; MOUNTING OPTIONS: Adjustable Strap with Buckle; Alternate: 1/4″ – 20; THEFT DETERRENCE: Cable Lock and Padlock Ready; BATTERY TYPE: 6 AA or 12V DC Alternate Power Option; COLOR: Non-Reflective Bark Pattern; MATERIAL: Molded ABS; Waterproof Housing; MEMORY: Requires Secure Digital Card, Up to 32GB; PRODUCT WARRANTY: 1 Year; OPERATING TEMP: -10 Degrees F to 140 Degrees F; DETECTION RANGE: 70′; FIELD OF VIEW: 3 Zone + 50 Degree Detection Angle; BURST INTERVAL: 2 Seconds or 0.6 Seconds; BATTERY LIFE: Up to 10,000 Images

Again, this is the first step, selecting a camera, and outlining exactly what intel you want to gather. After knowing these basics you can dive into actually setting up a trail camera in the field. The next step after determining what you want to use the trail camera for is selecting the trail camera location in order to capture that exact data.

Step 2: Trail Camera Location

Defining what you want to achieve with your game camera will tell you where to put it, it’s really that simple. Trail camera location is step and trail camera tip number two in this trail camera guide, and after the initial cam requirements, is the next most important consideration.

Food Plot Location: Either on a tree or a stake at a key entrance/exit point into or out of the food plot or high above the food plot for a time-lapse view.

Trail Location: At a 45 degree angle from the trail. Perpendicular or straight on from the trail can either not capture the deer or wildlife walking, and directly behind or in front of can result in spooked game or a picture that may have features like antlers covered up.

Bait/Mineral/Water/Feed Location:  The best trail camera location for a mineral, bait, water, or feeding site is position roughly 10 yards, close enough to see detail but distant enough to see everything utilizing the site.

Step 3: Trail Camera Installment

Each trail camera location that you end up installing a trail camera on will come with its own characteristics and limitations. A perfect tree will not always be available, rather it seems most of the trees you encounter are entirely too small or too large in diameter. When hanging and installing trail cameras, remember that you are not always limited to a tree or a fence post, and if you are, there are other tools other than a strap that can connect it to a tree.

trail camera tips trail camera mount | Muddy Outdoorstrail camera tips trail camera stake | Muddy Outdoors

Muddy has trail camera accessories that make it very easy to put a trail camera literally anywhere that you need. These trail camera accessories include trail camera stakes and trail camera mounts for either ground mounting or mounting on any sized tree or post. Both the Adjustable Trail Camera Support and the Dual Camera Ground Mount are important considerations when you are installing your trail camera.

Step 4: Trail Camera Field of View (FOV)

What is in the field of view for the trail camera? This is nearly as important as the consideration of how far the camera can detect and take pictures. As far as trail camera tips go, this one is often forgotten or goes unnoticed. What is in the FOV can determine a lot about the quality of intel you get. A branch, bush, tree, feeder, or another object in the FOV and frame can either set off the camera multiple times in the wind or block the image entirely. Objects can also interrupt the trail camera being able to detect wildlife, as well as catch the flash during the night.

Step 5: Trail Camera Night Photo Distance

Flash range distance during night events for trail camera should be considered when purchasing and determining the best steps in how to set up a trail camera. Step 5 in this trail camera guide is here for good reason. Often times night flash range and the ability to accurately judge what is in the photos/video during night events is often forgotten and ends in frustration of missed opportunities. A lot of wildlife, including deer, move during night-time hours, this is common knowledge, so be sure to include it when you are setting up your trail cameras.

The trail camera settings for the flash will include the sensitivity settings, high sensitivity should be used for open expansive areas such as food plots, bait, mineral, mock scrapes, watering holes, and feeding sites. Low sensitivity should be used on areas in thick areas and on trails.

Step 6: Trail Camera Direction

The sun can have a profound effect on the information you receive from your trail cameras. This is not discussing night vs. day activity or the events, rather the blinding effect the sun can have on the images themselves. Facing the camera East and West will result in white images or images that are unclear due to the sun. South is acceptable, but when setting up trail cameras always try and aim the camera north.

Step 7: Trail Camera Scent

This is especially true for deer, or just for keeping your trail camera safe from critters! Most people, when it comes to setting out trail cameras don’t think of, or simply do not care enough to worry about scent control and trail cameras. This is a big mistake. Number 7 on this trail camera guide is trail camera scent and it can be critical. Trail cameras set out for deer is one obvious reason to take consideration of the scent you leave behind.

Human scent is a form of human pressure, and too much around a trail camera station could leave that site useless for a duration that is critical for collecting information. On another front, attractive scent can attract unwanted attention and/or damage to your camera. Putting out feed, a bait, or minerals for deer or other wildlife, and not paying attention to the scent and potential attraction that is on your hands before touching the trail camera can leave your camera smelling like food. Raccoons and bears both can be fairly hard on cameras when investigating them due to the scent and attraction of food or bait.  This also gives more of a reason for ants to invade your camera.

Step 8: Trail Camera Memory Cards

trail camera tips pro cam 10 bundle | Muddy OutdoorsTrail camera memory cards are a significant consideration when learning how to set up a trail camera. Not having enough memory, and keeping the cameras out for an extended period of time could render the camera useless over time. Another consideration is also formatting the memory card to the trail camera. With today’s trail camera like the Pro Cam 12 or Pro Cam 10 offering higher and higher resolution video and ever increasing high-quality photos, the need for more space is evident.

The size of the memory card you need largely depends on the trail camera settings you choose to set, and/or how often you check the camera. A trail camera set on video mode, with a 10-30 second delay over a bait site, will burn through memory quite fast, while a 3-photo-burst at 5 min intervals on the same site takes much longer to fill the same amount of memory. When deciding on how big a memory card you might need, consider what settings you will have the camera on, how long you plan on not checking and clearing the card, and the potential frequency of events the trail camera might encounter. Overall a good trail camera tip to remember is an 8GB memory card is a safe bet for most trail camera applications. In some situations like the Pro Cam 10 Bundle’s case, a memory card Is thrown in with the purchase of the camera.

Step 9: Trail Camera Batteries

While some of the very first models of trail camera ran off of huge D batteries, most trail cameras now run off of AAs. These have more options, are more readily found, and are quite easy to set up with rechargeable batteries. These might be the best options, especially when running several trail cameras.

Cold weather has quite an effect on technology so always be sure to check your trail cameras battery life during the fall and winter months. Both Muddy Trail Cameras, the Pro-Cam 12 and the Pro-Cam 10 have operating ranges between -10 and 140 degrees.

Step 10: Trail Camera Settings

With everything else optimized the most crucial step is putting the trail camera on the right settings, this is where most hunters mess up. Overall the trail camera settings are largely based upon what intel you wish to receive. However, certain scenarios and situations require specific settings in order to work. Trail camera tips for the settings aspect cannot simply be a broad overstatement, but instead require careful consideration and planning. Generally, use common sense…write down your goals, and think out which settings will give you that.

We recognize the lack of information on trail camera settings based upon each scenario you encounter in the woods. Look out on the GoMuddy blog page for ann article specifically about trail camera settings based upon each situation.

Step 11: Trail Camera Security

The last step and trail camera tip is simple…it’s trail camera security. Lock it up or lose it. Unfortunately, there are trespassers and given an opportunity to steal a camera, some will take it.  Running a cable lock through your trail camera can easily deter this from happening.

Other Trail Camera Tips

While going through the trail camera guide and steps on hot to set up a trail camera, we mentioned several different tactics such as setting up trail cameras for turkeys, trail camera surveys, minerals for deer, and scouting velvet whitetails in the summer. The links below will take you to those blogs!