Posts

scouting deer public ground trail cameras | Muddy Outdoors

Scouting for Deer with Trail Cameras on Public Land

Successfully Find Bucks Using Trail Cameras on Public Land

Deer scouting is defined as spending time afield searching, investigating and evaluating one or more areas for white-tailed deer sign to improve the hunting experience. Basically, scouting for deer hunting is spending time in the woods looking for deer sign. Simple enough, head out a few weeks before deer season, look around and hang a few stands where you see the most sign. Or more commonly today, hang a few trail cameras and hunt in those areas where you see the biggest or the most shooter bucks. That approach can sometimes work on private land, with an emphasis on sometimes, but almost never produces consistent results on public land.

Public Land is Different

The issues with public land hunting are competition from other hunters and your inability to control the environment. It is no secret that the best hunting on public land is far from the roads. According to research from Duane Diefenbach of the Pennsylvania Cooperative Fish & Wildlife Research Unit and others, it is estimated that 87% of hunters in Pennsylvania hunt within approximately 500 yards of a road (http://www.tandfonline.com/doi/abs/10.1080/10871200591003445). That said, mature bucks tend to move to more interior habitats to avoid as much human interaction as possible.

On private lands, you know exactly who is hunting the same property and more than likely where those other hunters are at on most days. The same is not true on public land. You are constantly trying to beat other hunters to a prime spot in the morning, hoping your truck alone will deter others from walking in on your hunting area. Pressure likewise poses a problem when scouting for deer with trail cameras on public land. Secure deer trail cameras with locks and protective cases so your camera and all those pictures are still there when you return.

scouting deer public ground trail cameras | Muddy Outdoors

Also, you cannot control many aspects of the area you are hunting. For instance, other people who may or may not have the same hunting skills that you have, including scent control tactics, are going to be moving around your stands. Public means everyone, so hikers, bikers and certainly other sportsmen are going to be disturbing bucks in prime hunting locations. Bucks know this and finding the mature ones involves avoiding human activity as much as possible. Find areas that are not used or not used often by people. In addition, you have limited options to change the physical environment. Food plots and cutting trees are out; hunting public land means you have to find key habitat areas by scouting.

Scouting for Deer on Public Land

Scouting for deer on public land breaks down into two parts. First, start with a computer. Instead of pulling off the road in an area that “looks good”, start with scouting for deer on public land by using your computer. There are various freely available mapping programs out there. Find one that works for you and pull up topographical and aerial images of regions you are interested in scouting. This long distance scouting helps you discover key areas to setup your cameras. Look for cover funnels, habitat edges, saddles and points. Many of these tools also allow you to add points and save your maps. Perfect for identifying spots to hang trail cameras. Identified spots from aerial and topographical maps provide a thoughtful starting point to hit the ground.

Finding key locations from mapping technologies does not take the place of getting on the ground. The second part of scouting for deer on public land effectively is about studying travel patterns to and from feeding and bedding areas from the ground. You cannot be in different areas at different times so positioning your trail cameras in areas like these will give you an accurate picture of when and what types of bucks are around. Take note of access from roads and trails. Those play an important part in you getting to your stand and also how many other people may be using the area. Investigate land features, such as changes in habitat types or funnels, as possible options for stand locations. Look for past deer sign like old rub, scrapes and pellets. These clues help to determine placement of tree stands as the season approaches.

Scouting Deer with Trail Cameras

Trail cameras should be a significant part of any hunter’s scouting strategy. Deer trail camera photos provide scouting 24/7 so you can begin to understand deer movements in a particular area. They give clues to help you pattern buck activity and most importantly, they allow you to take an inventory of the bucks in the area so you know what kind of potential is available come fall. A good trail camera survey will help in the decision-making process when it comes time to actually head to the woods to start hanging tree stands.

Place trail cameras on trails leading to feeding areas when scouting for deer in the summer. As the season progresses, move some cameras to scrapes and other areas where rut activity is visible. Do not be afraid to hang multiple game cameras in close proximity to ensure you capture all the key elements of your hunting area. Public land bucks are more unpredictable than hunting deer on private land. Therefore your scouting for deer with trail cameras strategy has to compensate in order to get a clear picture of the type of bucks and their movements in your location.

One of the biggest mistakes deer hunters make is not identifying bucks that are killable from their deer trail camera photos. If you are scouting deer with trail cameras correctly, there will be hundreds of photos to sift through. Do not waste time analyzing bucks you will never be able to harvest. Observed activity of mature bucks on your trail cameras will determine if a buck will be able to be killed. If a buck is strictly nocturnal your only chance may be during the rut. If a buck is active during the day then it depends on where he is active. His activity must be in an area that is accessible for hunting without spooking him off. Luckily, cameras provide you all this information. The challenge is finding places to put your trail cameras on public land.

Where to Put Trail Cameras for Deer

Scouting for deer on public land does not have to be frustrating nor does it have to be an exercise in futility. Trail cameras are clearly not just for private land. However, as discussed earlier, do not just throw some game cameras up without some thought. Getting the best trail camera pictures required to evaluate an area is more skill than luck. To find the best bucks on public land, grab your deer trail cameras and head to these three places for scouting.0

scouting deer public ground trail cameras | Muddy Outdoors

  1. Explore newly purchased public land or boundary extensions. These areas are unknown to most hunters and often border great buck habitat that was once off limits. Land acquisitions can be found on most state and federal land management websites. Keep current with those areas that have been purchased and spend time scouting for deer in the summer on these additions. Place trail cameras on border zones to capture deer activity from adjacent properties in order to plan fall tree stand placements. Also, it is worth noting any land additions that are in the pipeline. You can get a head start on these new areas by scouting for deer hunting from your computer so you are ready to hit the ground once these areas are open for hunting.
  1. Scout fringe areas, which are edges of public land. Fringes like borders with adjacent properties or areas like pipeline right-of-ways can be rewarding and disappointing at the same time. These areas are typically closer to human access points where hunting pressure will be greater. Because of this, understanding all the possible access points of other people including roads and trails is key. If you can understand the amount of and where the pressure is coming from, you will be better able to eliminate areas where not to put stands.

On the other hand, fringe habitats often provide food sources unavailable to deer in interior forests. Also, conservation agencies frequently plant food plots or other wildlife forage in fringe areas making them highly attractive to deer. Even with the added pressure deer will routinely travel these fringe areas to feed then return to more isolated interior areas. The trick here is finding travel routes to and from the fringes. Trail cameras should be setup on several deer trails. The photos can then tell you exactly when deer are using this area. Too much pressure and deer will be nocturnal. Capture a buck on your camera during shooting hours and it is game on.

  1. Focus on small, ignored public land areas. These can be an island of unique habitat or more commonly a disconnected piece of land. Do not overlook these seemingly insignificant fragments of public land. The masses of hunters rarely consider these tracts part of the larger public lands so pressure is reduced. Big whitetails seek out separated islands of lands as pressure from adjacent properties increases. Scouting here is similar to scouting fringe areas. Positioning your trail cameras on trails will give you a good idea if this isolated piece of ground is the right place to hunt.

Speaking the words public land hunting usually send chills down the back of even the most dedicated hunter. Putting big bucks and public land in the same sentence is hardly ever believable. However, every year tags are filled with trophy whitetails from public lands. What is the common thread? Scouting. Scouting for deer on public land with trail cameras is essential for harvesting mature whitetails. No more shall you be frustrated during deer hunting seasons on public land.

Positioning your trail cameras for the best shots | Muddy Outdoors

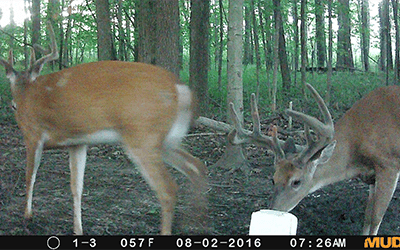
Muddy Trail Camera Tactics | 5 Tips to get the Best Trail Camera Pictures

Positioning Your Trail Camera for the Best Shots

We’ve all been there. After letting your trail cameras sit in the woods for weeks, it’s almost like Christmas morning when you finally get to check what’s on them. Like an excited kid, we plug the trail camera chip into our computers and open the folder. That’s when the disappointment starts. In your haste to set the camera up, you didn’t pay attention to a few basic rules of good pictures. Now you sadly scroll through picture after picture of dark, misaligned images. Those weeks of time in the field can’t be recovered either.

Most hunters use game cameras to help with their scouting efforts. They’re our eyes in the woods when we can’t physically be there to observe it all. Because they are so discrete and unobtrusive, some people even use trail cameras for security purposes, though we’ll be focusing on the hunting application here. They allow us to keep tabs on natural deer or turkey movement patterns so that we can make a more informed decision about where to hunt. Ultimately, they can help us pinpoint a mature buck’s home range and schedule, which is very difficult to do without a camera. But more importantly than all that, trail camera pictures are just plain fun and addicting to look at and collect. Trail cameras for wildlife offer a secret glimpse into the lives of wild animals, which is a rare and special opportunity. Most hunters would be just as excited about a dramatic nature scene unfolding in the picture as a mature 8-pointer strolling through.

But in order to get a jaw-dropping picture like that, you need to consider a few things before you just mount your camera on a field edge and walk away. Specifically, there are five C’s of good trail camera pictures that you’re probably missing or not thinking through fully. Let’s discuss them below.

The 5 Tips or C’s of Good Trail Camera Pictures

If you’re not at least thinking about each of these, your pictures probably aren’t coming out as well as they could be. They don’t take very long to implement, but the payoff could be huge in terms of high quality pictures. Take a moment to read through these trail camera tips so that your next pictures will be ones you’ll want to frame and put up on the wall.

Camera Angle

The trail camera angle is one of the most important pieces to keep in mind, since it will most affect how your pictures look and determine if you get any good pictures at all. Choose the wrong angle without confirming anything, and you could end up with a bunch of below-the-knee shots that nobody wants to see. Don’t mount your camera too low or too high; you’re looking for the sweet spot of about 4 feet off the ground. At this height, you shouldn’t have to adjust the angle up or down all that much, but we’ll confirm that below. You may want to keep the height lower if you’re specifically interested in turkeys or higher if you want a larger range, but four feet is a good starting point. Also, make triple sure that your trail camera is pointed at the right spot. For example, if you’re taking pictures on a mineral site, try to keep the site at the bottom central area of the camera. If you’re on a deer trail, don’t position it directly perpendicular to the trail as you’ll miss many triggers; instead, aim it either up or down the trail so you can get some approaching or leaving shots. These pictures look more unique and can show you more detail than a broadside picture anyway.

As you set the game camera up, pick your best hunch on the camera angle. Before you leave it though, do a few test pictures. Walk in front of it where you assume the deer will be, and then look at the chip using a card reader or laptop. If you’re way out of the frame, then you just saved yourself weeks of lost time.

Contrast

For the purposes of this discussion, we’ll define the contrast as the light exposure of your game camera pictures. Too little light and you won’t be able to see anything clearly, but too much light means your pictures will be overexposed and hazy-looking. There are a few things you can do to help with this issue.

Positioning your trail cameras for the best shots | Muddy Outdoors

The easiest one is to place your trail cameras where they won’t be so sensitive to the sunlight. For example, placing them in a shaded forest setting will moderate the light levels for you and let your trail cams take great pictures throughout the day. Placing them in an open field can work on cloudy days, but it tends to overexpose the pictures when the sun is brightly shining. You’ll also find that shadows of clouds or nearby trees could be so stark that they trigger the camera. It’s no fun looking through 300 photos of cloud shadows.

If you have a great food plot you want to keep tabs on, there are some ways to mitigate the light levels and contrast of your pictures. North is the best direction to face a trail camera, because it avoids looking right into the southerly sun. When the sun is directly above and facing into the lens, each picture will be hazy and you could have many glare issues affecting your pictures. You can actually point your trail cameras east and west, but your morning or evening pictures, respectively, will get a little washed out. Just remember that north is best.

Color

Positioning your trail cameras for the best shots | Muddy OutdoorsHave you ever browsed through your pictures and had an amazing shot or two? But after a closer look, you realize the colors are really off-balance and subtract from the overall picture quality.

While the contrast and light exposure discussion above is closely tied to this and will help you tremendously with getting good, vibrant colors in your pictures, there are a few other things you can do. The Pro-Cam 10 bundle is a great option if you’re looking for a solid package, as it includes the trail camera, an 8 gigabyte (GB) chip, and 6 AA batteries.

Composition

While most hunters would be thrilled to get an awesome shot of a mature buck making a scrape, think of how much better that picture could be with the right background. For example, take that mature buck and place him on a backdrop of a scenic oak flat with filtered sunlight and a pond reflecting the tree canopy. Stunning. Now place that same buck in front of an overgrown weedy field. It’s not quite the same, is it?

Obviously, not everyone has a postcard-quality property with scenic outlooks, but you surely have some spots that are better than others. Avoid areas with too much “junk” in the background (e.g., brush, blow-down, weed patches, etc.). Just keep this in mind as you set your trail cameras up, so that when you luck out with the shot of a lifetime, the background doesn’t ruin it.

Chips

No, not the crunchy kind in a bag. We’re talking about trail camera chips. It’s tempting for some hunters on a budget to skimp on this step so they can buy more low-quality chips instead of fewer high-quality ones. Unfortunately, the chip you buy can make a big difference on getting good trail camera pictures.

Obviously, you should get the chip with the most memory you feel comfortable buying so you can leave it out for weeks without worrying about running out of room. The higher resolution pictures really burn through digital real estate quickly, so an 8 GB card should be a minimum choice to start with. If you plan on taking a lot of video, a 16 or 32 GB card would be better. Also, some deer trail cameras require certain newer cards, which basically operate faster. If you were to use a lesser quality card with one of these cameras, you wouldn’t be pleased with the result.

Never delete pictures from your card while it is in your computer. You can actually affect the way your camera reads it. For best results, copy any pictures you want to keep to your computer, and format the card in your trail camera each time you install it. This removes the pictures from the card and basically starts fresh.

Positioning Your Trail Cameras 

Now that you know what’s required for good trail camera pictures, you can focus on actually getting your camera mounted the right way in the field. If you’re wondering how to position your trail camera, don’t worry – it’s very simple. In more cases than not, there will be a suitable tree near where you want to take pictures. Simply attach your camera to the base of the tree. Secure a cable lock on it if you’re putting them on public land, just in case. Sometimes all the trees are leaning a little too much or there simply are no trees where you want to hang a camera. In that case, you need to get creative.

Positioning your trail cameras for the best shots | Muddy OutdoorsIf the trees are less than ideal, you can always use a Muddy Outdoors trail camera support, which simply screws into a tree or post. This trail camera mount allows you to adjust the angle and position of the camera itself. Of course, that won’t be of any help in an open field should you feel the need to put one there. In that case, the Muddy Outdoors dual camera ground mount is your solution. Simply stick it into the ground wherever you need a pair of eyes, adjust the height from 19 to 41 inches, and attach up to two trail cameras to it on the trail camera arms. That way, you can cover two different directions and make sure you catch anything that walks by.

If you hadn’t ever really considered the five C’s of good trail camera pictures, now you should understand why they’re important and how they can affect your scouting efforts. Whether you use them in spring to watch the development of the deer herd, or only in fall to see what the big boys are doing, you want to have the best information you can get. By locating and positioning your trail cameras correctly and making sure you use high quality gear, you can be sure you’ll get better pictures than ever before. And for those who take hunting seriously, that attention to detail matters.