
Get The Most From Your Trail Cameras This Spring
Trail Camera Tips | Trail Camera Selection, Settings, Placement, and Considerations for Spring
March is a hard and puzzling month, old man winter is confused, plants are confused, deer and turkey are confused, and you are completely lost. Plants, wildlife, and you, yourself do not even know whether or not to pull the trigger on spring activity or still lie dormant. Warm, sunny, 70 degree days one week, bitterly cold, snow storms the next is common, leaving you literally never knowing what March will throw at you. Most hunters, including yourself, are probably just breaking out of winter hibernation, and let’s face it, you were not productive were you? The most you might have achieved is getting your tree stands, ground blinds, or box blinds out of the elements over the winter, some shed hunting, but other than that you were unquestionably a dormant bear on that couch! You’re not the only one in the situation, besides other hunters both deer and turkey are in a tough transition this time of the year. During this time, it is important to act first, make the first strike on the season by getting your trail cameras out this spring and start the year’s observations. Follow these spring trail camera tactics to make the most of your cameras, your time, and ultimately your hard earned money.
Blowing the dust off, or opening the new box?
Game/trail cameras are without a doubt, one of the best management tools that a land manager can utilize. When it comes to documenting how your management implementations are progressing, a trail camera will provide information that is, in some cases, impossible to obtain otherwise. Before we dive into where, when, and how to set up your trail cameras this spring, you need to do an inventory check.
What cameras do you have? Are they still working? Are they the right camera for the situations that you will need to observe in the spring/summer?
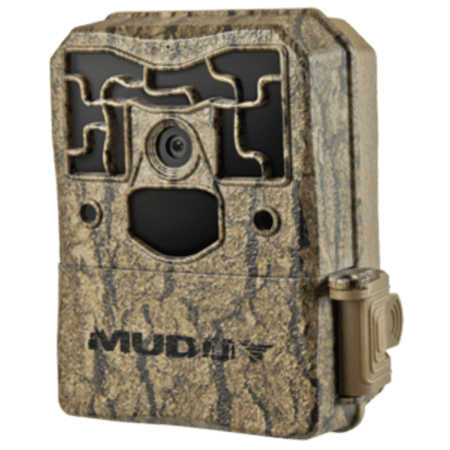
Most likely your cameras are going downhill after a long season in the field, maybe they are still old school and lack the new features that are the standard in the industry. They might even be the reason behind the lack of bucks on your property, literally being too loud or too bright of a flash, or maybe you have mature bucks on the property, but the cameras just are not capturing all the movement! There is a lot at stake and a lot to consider. So the question is no longer if you should purchase a trail camera, but what type of camera should you purchase? There are numerous companies that make various models of cameras. Some cameras focus on trigger speeds, some feature time-lapse options, and other models feature HD video mode, or burst mode imaging. The model you choose depends primarily on what you want to know. Considering all cameras have improved their battery life and memory recently, let’s discuss their photo-capturing abilities to ensure you get the most from your unit.
or example, if you are monitoring an area to document wildlife activity during food plot maturation, a camera with a time-lapse ability will be the best option. The time-lapse option will take photos at a pre-determined interval, therefore an animal does not need to be within a certain range to set the unit off. They will be captured on film regardless of how close or far away they are. This is ideal for open agricultural fields or food plots where wildlife congregates, especially if nailing down entrance routes into the field is tough to do. On the other hand, if you are capturing images to determine a buck: doe ratio, still images work best. Most trail camera surveys require baited sites, so any camera that takes still images will be preferred, even if it has a slower trigger speed. If a camera has a not-so-great trigger speed, it should be placed over a baited site where the animal will be stationary for some amount of time. Other cameras that have lightning-fast trigger speeds can be situated on trails, funnels, and travel corridors. By using your camera in this fashion, you are revealing useful management information but also capturing awesome photos.
Trail cameras that feature video, especially with audio, are great units that can be placed in various areas that not only provide insight on the wildlife that is using a particular area, but also make neat videos. A still image of a whitetail buck working a scrape is great, but a video where you can see and hear him in action is even better. The same goes for orienting a camera in a strut zone for turkeys. Once again, a video of a gobbling tom trumps a still photo. These camera sets are sometimes located at the base of a tree, looking up at the licking branch over a scrape. This setup provides a unique angle and adds a twist to an already great video clip. This can easily be done with the use of a tree mount in order to orient the camera in an upward angle at the base of a tree.
Today’s new camera units are jam-packed with technology and can tell you just about anything you would want to know about monitoring activity on your land. But before you jump the gun into a new camera, or think you can just settle with your old one, let’s examine the situations, and the exact requirements that you will need in a trail camera for this spring.
What is Spring?
The answer is easy, spring is several things, beautiful, warm, sunny, life giving…but less harsh than winter, is unfortunately not one of them. While winter zaps battery life, it also does not require too much of a camera, there is really not a lot going on especially in heavy snowfall, and just plain old cold cannot completely kill a camera. Spring on the other hand is an explosion of life. In order to capture anything and everything that can and will be of use to you, a camera that can not only capture it is required, but one that can also survive.
Spring is wet, humid, and full of critters. Water damage (rain and humidity), critter damage (ants), and even other human’s stealing the cameras are all of concern before we even dive into specific situations of trail camera use and placement. So keep this harsh environment in mind when thinking about your current trail cameras, or new cameras on the market.
Spring food plot monitoring
While all this crazy weather is going on, it is literally the perfect time and opportune moment to start your food plots for the spring. You’re crazy to think we are suggesting to plant beans or corn during this time of year (this early), but a more effective, potentially more important food source for whitetails this time of year is early clover plots. Clover plots excel this time of year, being one of the first green sprouts that are rich in protein and nutrients a pregnant doe or a budding buck will gladly devour.

Having this extremely useful plot, especially in areas where you could not reach the acreage to plant beans or corn, will allow you to pull, hold, and observe mature bucks over the spring and summer. Whether its frost seeding a plot, installing a poor man plot, or disking or tilling up a small plot, putting in clover now can be rewarding all year long. In this instance, a camera on video mode, time-lapse mode, or simple image burst will work. Given the normally small acreage of the plots time-lapse isn’t necessarily needed, but will still be advantageous. Put the trail cameras up in early spring to observe fawns and bachelor groups in spring and summer, and be sure to keep them up. The small clover plot is an ideal area to hang a set for a staging area into larger food plots in the early season.
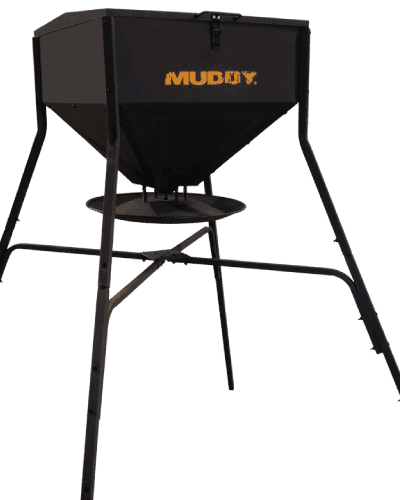
Deer feeders
Nutritional needs fire back up after the long winter, that much needed protein and nutrients available in clover and other food plots during the spring, can be easily supplemented or added to with a deer feeder. Consequently feeding stations make perfect opportunities to observe feeder use. In order to minimize stress on a feed site, and to keep deer and turkeys coming back, a camera should be small, quiet, and have an invisible flash. Either video, or image burst works well, but set the camera on a 5 minute or longer delay in order to avoid the thousands of pictures, but still identify each visit.
Feeders unfortunately attract unwanted attention from neighbors and trespassers, so be sure any trail camera placed over a feeder is either locked on the tree, or small and compact enough to hide well.
Deer feeders
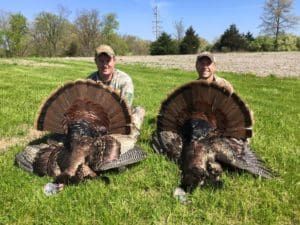
If food plots aren’t on you forte, you may want to reconsider. Pacing trail cameras on or over small clover plots will most likely reveal a strut zone, or area where toms and hens will gather during spring. Clover plots are coveted by turkeys and turkey hunters during the spring. The hens will feed there and bring in the toms, which will give you an ideal spot to set up the decoy and ground blind. Besides clover plots, open fields, Ag fields, pastures, or open wood lots make perfect strut zones.
Trail camera selection and more importantly trail camera settings will be slightly more dependent on the situation you are heading off to be your opening weekend spot. If you are in heavy timber image-bursts or video mode with minimal delay is ideal to place on funnels or routes turkeys will take going into or out of food sources, or where they might end up scratching throughout the day. For the fields and food plots place the trail camera settings on time-lapse. This will end up giving you exactly where and when the toms hang out in the field.
Mineral Sites
When spring annuals and food plots sprout up, minerals and slat attractants are put down. Have you ever wondered why deer and salt are so attractive to deer during spring in particular? Sure they use the traces and nutrients, but salt is what they are after. High water content in the rapidly growing plants of March, April, and May equates to a lot of water metabolized by deer, causing a need and crave for sodium.
Luckily this need creates a very attractive site, and opportune moment for a photo session. Either a video or photo burst works well with mineral sites. One thing that goes for both mineral sites and feeders is distance of the camera….to close you don’t get the entire picture and you have the potential to disturb the deer, too far and you cannot see the detail you would like. Finding a camera with a great invisible flash range, plus high MP, quality images and HD videos should be a no brainer for purchase in these scenarios.

Trails and Funnels
Placing trail cameras over trails and funnels really seem to be underestimated, and for good reason. Placing cameras over mineral sites, clover plots, fields, and strut zones are so much more effective. But placing trail cameras over trails, runs, and funnels can and often will be more effective at telling you information you will rely upon. If you have deer hunted long enough, even turkey hunted long enough, you know particular things about their movements. Mature bucks, or turkeys might be camera shy when it comes to a mineral site, or field edge. But hanging a camera, the right type of camera is essential, high looking over a trail will often catch mature buck or tom movement that will otherwise go unnoticed.
Both deer and turkeys will often take the excursion approach when it comes to their daily movements. Sure, they are on patterns when it comes to spring and even more so for summer, but that does not mean they won’t take the safest route. This is why the right type of camera is important. A small, quiet, inconspicuous, and invisible flash camera is perfect for trails. A mineral site, feeder, or clover plot might be anticipated for some sort of stress (camera flash, sound, physical sight of the camera itself), the deer get used to it and the costs (stress) do not outweigh the benefits (food and nutrients). A trail can easily be wrote off if stress is involved. Keep your trails and funnels stress free all year in order to preserve them active.
So which camera is right for you?
Your next step is to blow the dust off your old trail camera, is it even working? Is it worth it to buy the batteries needed the rest of the year, is it time to take it out back and (metaphorically) put it out of its misery?
Next, decide which scenarios you see yourself needing a camera for. Are you the avid turkey hunter, fanatical deer hunter, or the passionate land owner/manager? Are you all three, like every hunter seems to be? In that case strongly look into purchasing a camera with the following requirements.
- Small/Compact size
- Able to be cable locked and secured
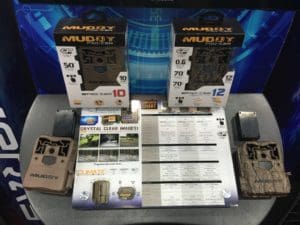
- High image quality ( Trail cameras in this century should be at or above 10MP)
- Photo-Image burst capability (day and night)
- Time-lapse capability
- Video capability (Audio included)
- Invisible flash (black)
- Simple operation and backlit screen (to see in low light)
- Trigger delay options
- Image data: time, date, temp, camera ID
- Waterproof housing
- Product warranty
- Battery type: AAs (are easiest and have great rechargeable option)
- Detection and flash range > 10-15 yards (30’-45’ at least)
- Wide Detection Angle
- Several mounting options: tripod, screw in, and straps
Spring has arrived, and with it an opportunity to gather some critical information with your trail cameras. Don’t miss this opportunity due to an old camera, or an inefficient new one. Make the right choice and follow these trail camera tips on settings, placement, and considerations for this spring.